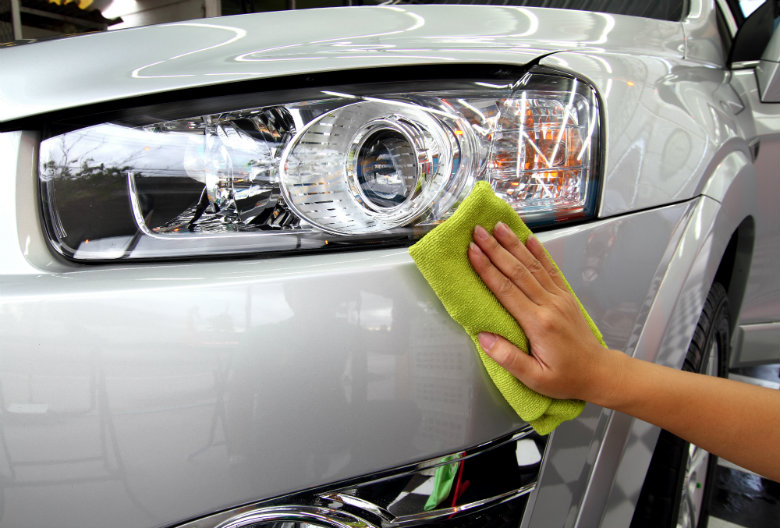
A car is a machine with thousands of moving parts that work together as a system to get you where you need to go. Eventually, various parts of the machine will need to be serviced so that the entire unit functions properly. Routine car maintenance is crucial to reduce expensive and unnecessary large repairs in the future, increase the vehicle’s performance, and extend the car’s longevity.
There are two main options when it comes to car maintenance. You can either perform a Car Maintenance DIY (Do-It-Yourself), or take your car to a mechanic. There are some jobs that are better left to the professionals. However, other car maintenance tasks require little equipment, time, money, or skill.
Beyond saving you money, performing general Car Maintenance DIY jobs present you with the opportunity to gain new skills and knowledge. You will come away from a first-time DIY project with the confidence and courage to attempt future undertakings. If nothing else, tinkering under your car’s hood will help you develop a greater appreciation for automotive professionals.
We have created for you a list of 5 car maintenance tasks that you can do yourself. These tasks include replacing wiper blades, diagnosing fuses, changing lights, replacing engine air filter, and changing engine oil. For more tips on maintaining your vehicle, check out our Car Maintenance Guide.
These vehicle maintenance jobs are relatively easy to perform. Therefore, no matter your experience level, we are confident that you are capable of successfully completing these tasks. If you do not feel comfortable in your abilities, take your vehicle to your local mechanic to be serviced.
In this post, all of your questions will be answered. This would include questions revolving around the required tools and time needed to perform the maintenance job. In addition, we will discuss how you know when the parts need to be serviced. Let’s get started.
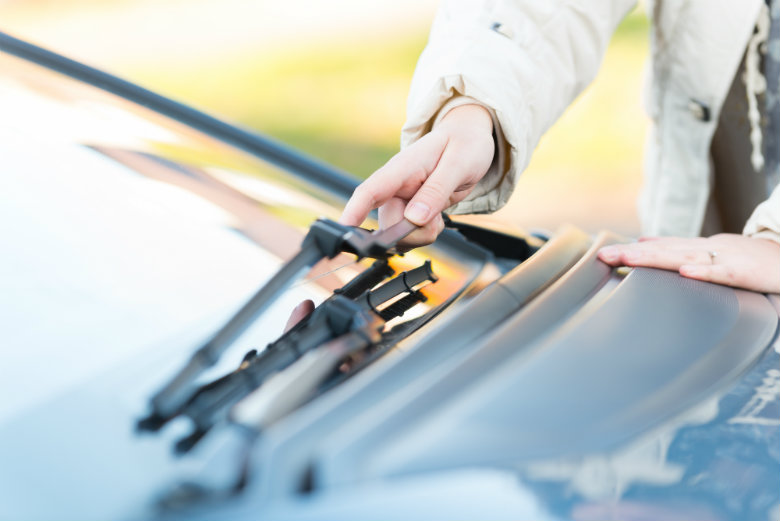
1. Replacing Wiper Blades
Why DIY?
Replacing Wiper Blades is a very simplistic task. Wiper blades are located on the exterior of the vehicle, making them easy to get to. In addition, instructions on how to replace the wiper blades are often printed on the package of the product, which can be purchased from any local auto parts store for $5 to $15. No tools are required, but sometimes individuals utilize pliers. The entire job will only take between five and ten minutes to complete. Overall, you will save time and money replacing wiper blades yourself.
When To Replace:
Wiper blades typically need to be replaced every six months to one year. However, you should inspect wiper blades every few months, especially at the change of the seasons. The rubber portion of the windshield wiper is the part that usually degrades over time. Signs that it may be time for a replacement include streaks on the windshield, as well as any visible cracks, bending, or splitting of the rubber portion. Weather conditions, such as ice and snow, can cause the blade to become weak and bend. Therefore, if the blade is not making contact with the windshield or having problems with chatter, it is time for a new one.
How To Replace:
- Place a towel on your windshield if you fear that the wiper might snap back and cause damages.
- Press the release mechanism on the wiper arm.
- Pull, and push the old one off. It will either be a hook or pin system.
- Hook – Put the new wiper blade on. You should hear a click. Pivot around.
- Pin – Insert the the wiper blade arm on the pin. Push down on the tab until secure.
Helpful Tips:
- Wiper Blades are sold by length. You can refer to your manual, measure the blades yourself, or consult your local auto parts store for assistance. Some vehicles have different size blades on the passenger and driver side. Therefore, if you are measuring yourself, be sure to obtain the length of both sides.
- Take care of your windshield. Clean your windshield frequently to keep dirt, grime, and bugs from building up. A clear windshield is crucial for seeing potential hazards on the road. To improve visibility in bad weather conditions, try a windshield water repellent.
- Do not forget about your rear windshield. Many vans and SUVs have a rear windshield wiper, so do not forget to replace this one, as well. It is best to replace all wiper blades together.
- Refill windshield washer fluid. Check to ensure that your car has windshield washer fluid. If the system has fluid and does not work, locate the sprayer nozzles. Look for a blockage from dirt and debris. Use a needle or thumbtack to clear any blockages. Check for leaks in the washer fluid tank and tubes, as well. If you cannot resolve the problem, take your vehicle to a professional.
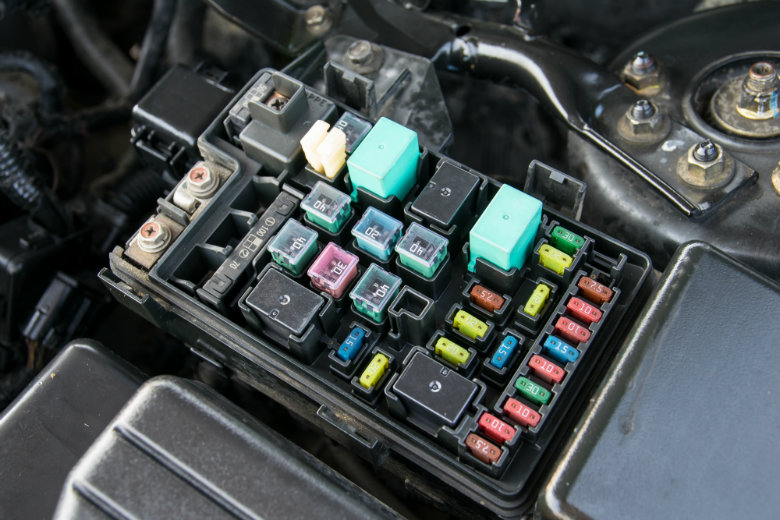
2. Diagnosing Fuses
Why DIY?
Checking and changing car fuses is not rocket science. Everything is labelled for you in the fuse box cover. In addition, the fuses are color-coded according to amps. The hardest part is locating the fuse box. You can use your owner’s manual or conduct an internet search of your vehicle’s year, make, and model. Many vehicles have two fuse boxes, which may be located in a panel under the dash, in the trunk, on the side of the dash, under the rear seat, or under the hood. Fuses are cheap to purchase, but many cars have spares in the fuse box. You can complete this job in under ten minutes.
When To Replace:
What are fuses for? Why do they blow? First off, there are fuses corresponding to a wide array of your car’s features, including the horn, radio, and lights. Fuses carry a flow of electricity, and when that current becomes too strong, fuses may blow. If one of your car’s accessories suddenly stops working, it may be as a result of a blown fuse.
Tools Needed:
- Flashlight (For better visualization)
- Screwdriver
- Voltmeter, Multimeter, or Automotive light
- Fuse puller or needle-nose pliers
- Replacement fuses
How To Replace:
- Locate fuse box.
- Remove covering panel (may need screwdriver). The back of the fuse box cover shows the location of each fuse.
- Locate the suspected blown fuse. Use a fuse puller to remove and inspect the fuse.
- If the inside connections of the fuse are broken or black, replace with a new fuse of the same amperage.
- If you do not know which fuse is bad, you can use a voltmeter, multimeter, or automotive light to test the fuse while it is still in place.
- Start the car to see if it worked. If the new fuse blows immediately after install, there may be a circuit problem.
Helpful Tips:
- Be careful when removing or replacing fuses. Do not inspect or change fuses with the vehicle on. Some cars have glass tubular fuses, which are easily breakable, so exercise caution when handling.
- Replace old fuses with fuses of the same amperage. If you replace an old fuse with a fuse of lesser or greater amperage, then it could blow before it should or cause damage to the system.
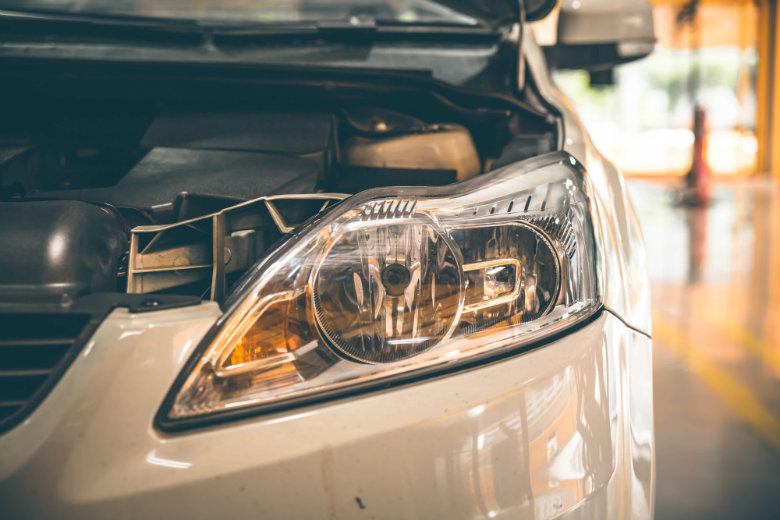
3. Changing Lights
Why DIY?
Changing a light in your automobile is similar to replacing a bulb in your house. Although changing a car light requires a few extra steps, it remains an inexpensive, straightforward process. The task will only require approximately ten minutes or less of your time. The only tools that you may need are a screwdriver, gloves, and cloths.
When To Replace:
Car lights, like all parts, will eventually burnout and need replacing. A burnt-out headlight or taillight is dangerous, and you run into the possibility of getting a ticket. It also interferes with visibility by decreasing light output. Lights also line the interior of the car’s roof and door edges. These interior lights illuminate the car in the dark. Car lights can last up to two years before they need to be replaced.
How To Replace:
Headlight:
- Open the car hood.
- Locate the headlight, which will be in a bulb holder (Look for 3 wires attached to the plug at the base of the headlight held by a a plastic catch, metal clip, or screw cap).
- Remove old bulb, and replace with new one.
- Put headlight holder back in, along with wires.
- Test the bulb.
Taillight:
- Remove the taillight cover (It may include screws, tabs, or knobs).
- Unscrew the bulb, and replace with a new bulb.
- Replace the housing.
- Test the bulb.
Interior Light:
- Remove the light cover (A screwdriver may be necessary; Otherwise, it will just pop off).
- Use a clean cloth or gloves to remove the bulb.
- Clean off the light cover.
- Replace the old bulb with a new bulb, and replace the cover.
- Test the bulb.
Helpful Tips:
- Do not forget about your other lights. There are more lights on your car than the headlights, taillights, and interior cabin lights. Do not forget that the fog lights and license plate light may also need to replaced.
- Replace both lights at the same time. Replacing both headlights at the same time is important for symmetry and balance. This ensures that both of your lights are producing the same amount of light. It also keeps you on a schedule, so that you do not have to change one light before the other.
- Use gloves when handling. Wear gloves when handling halogen light bulbs, as skin oils can affect the brightness or cause damage to the bulbs.
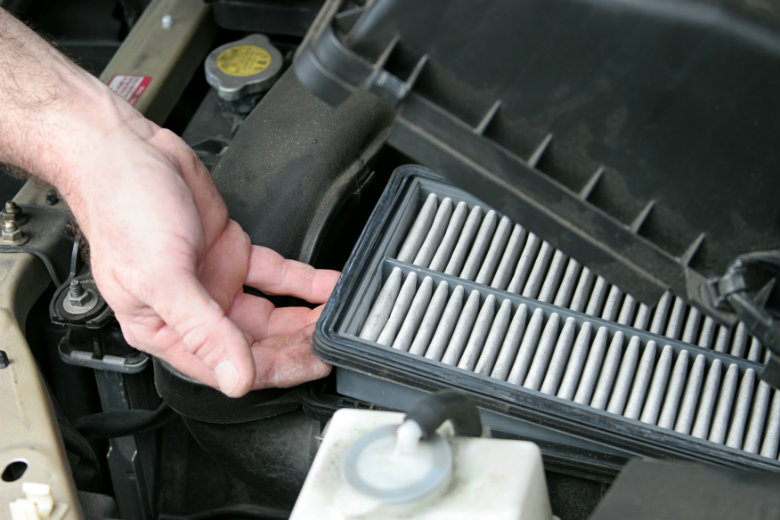
4. Replacing Engine Air Filter
Why DIY?
Like many of the other Car Maintenance DIY jobs we have listed, replacing the engine air filter will save you money and time waiting at an automotive repair shop. You can easily find an air filter that suits your car at your local auto parts store. The entire process will take you fifteen minutes or less. In addition, the task does not require any tools, but maybe a screwdriver.
When To Replace:
The engine air filter is like your car’s lungs. It keeps the inside of the engine free of debris, dust, dirt, and insects. This part should be changed every 25,000 miles, because it becomes brittle and dirty with age. An engine air filter should be changed more frequently if the automobile is in frequent stop-and-go conditions or travels on unpaved roads often. Proper maintenance of the engine air filter is important for fuel efficiency, engine performance, and acceleration. A dirty air filter could cause damage to the spark plugs, which are important in starting your vehicle.
How To Replace:
- Locate the engine air filter (It is located under the hood near the driver’s side top of the engine compartment in a rectangular or cylindrical shaped housing).
- Remove the housing, which may snap on or contain latches or screws.
- Remove the filter.
- Clean air filter housing with a shop towel or vacuum.
- Replace with a new filter. Insert into housing with rubber rim facing up. Edges should be sealed by rubber.
- Replace cover.
Helpful Tips:
- Old versus New Models. Older vehicles feature a bulky, round housing made of plastic or metal. On the other hand, newer cars feature square or rectangular housing compartments for the engine air filter.
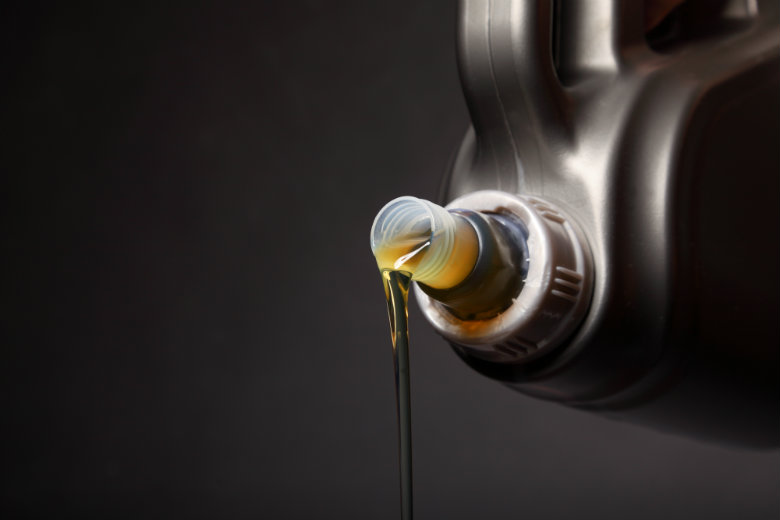
5. Changing Engine Oil
Why DIY?
This task may not save you a lot of money, but it is simple and saves on drive time going back and forth from home to the mechanic. It is also a crucial part of vehicle maintenance, so it must be completed. Although it does not save you much in expenses, changing your oil is always good to know how to do. This job typically takes about thirty minutes. However, it may require more time your first go-around.
When To Replace:
There is a dashboard indicator light for oil pressure. Rather than relying on this system to tell you when you need an oil change, consult your vehicle manual or car manufacturer for recommendations. The time range varies from every 3,000 miles to every 10,000 miles or more depending on your driving habits and the type of oil (Conventional, Synthetic, High Mileage) that you use. More frequent oil changes are required if you drive under the following conditions: extreme temperatures, stop-and-go traffic, frequent short trips, or towing.
Tools Needed:
- Latex globes
- Oil filter
- Oil filter gasket
- Engine oil
- Wrench set (including oil filter wrench)
- Funnel
- Drain pan
- Jack/Jack stands
- Plastic container (for used oil)
How To Replace:
- Place plastic sheet on ground to eliminate worry associated with oil spills. Drive car on it.
- Jack up the car. Set the jack stands in place, and lower the car.
- Open the hood, remove the oil cap.
- Place a drain pan underneath the car. Under the car, unscrew the drain plug.
- Remove the oil filter (Use a filter wrench to loosen, then complete with hand).
- Install a new filter.
- Once the old oil has flowed out, install a new gasket (coasted with oil) on the plug.
- Wipe drips with a rag.
- Under the hood, refill the engine oil (4-6 quarts) with a funnel.
- Check the dipstick to assure the appropriate amount and level is obtained.
- Recycle the old oil in a sealed plastic container. Take to a local PepBoys, O’Reilly Auto Parts, or AutoZone location.
Helpful Tips:
- Let your car run idle for a few minutes before changing oil. Cold oil will not not drain properly, but you do not want hot oil either.
- Get the proper filter. There are economy oil filters which get approximately 3,000 miles and high quality oil filters which get more than 3,000 miles.

Importance of Car Maintenance:
There are many parts to a car that must be cared for regularly, so wherever you can spare a buck or two will greatly help. Car maintenance is important so that you can keep your car running smooth for as long as possible. You rely on your car as a necessary means of transport, so it must be reliable.
We are going to take a step back for a moment. If you are a car collector, vacationer, military personnel, corporate businessman, or simply an individual who owns a vehicle, you may be in need of our services, so we are talking to you. Have you ever thought about shipping your vehicle? Well, car maintenance is involved in the auto transport process, as well.
Think about it. The whole purpose of hiring an auto transport company is to get your car where it needs to go so that you can drive it. However, if your car is not properly maintained, it will not be ready for you when you need it the most.
Why use an auto transport company? Why National Dispatch?
- Simple, fast, and reliable. Door-to-door service is provided, so an auto transport professional will come direct to you. By hiring National Dispatch, you can rest easy knowing that your car will reach its destination without incident-free.
- Saves you time and stress. Using an auto transport company means no unnecessary drive time and a stress-free experience.
- Caters to your needs. Whether you need enclosed or open auto transport services, we have got you covered. In addition, National Dispatch is capable of transporting your non-running vehicle.
For a free, instant, online shipping car shipping quote using our online quote calculator go to https://www.nationaldispatch.com/. You can also call us at 800-321-2051 to speak with one of our auto transport specialists. They are happy to answer any and all of your questions concerning auto transport.